September 6th, 2010
Just last week, I found my ’04 Acura TSX’s navi unit inoperational. The screen showed “DVD Reading Error”. I went googling a bit and found that I wasn’t alone. Some people suggested to send the unit back to Alpine (1-888-NAV-HELP) for reconditioning. That would have cost $160. Another option was buying a replacement unit off of eBay. That would have cost about $500 – $600. Last option was going back to the dealership to have the entire unit replaced. That would have cost $4000+. That’s kinda outrageous. Even $160 to recondition the unit is too expensive. What would they do to recondition the unit? Replace the DVD drive in the unit? I think the first thing they would do is just cleaning the lens to see if that fixes it. That’s exactly what I did to fix my navi.
I forgot to take pictures when I cleaned the unit. Taking it back out for photograph is kind of a hassle so no pictures in this instruction.
This is what you need to start:
- Philips screw driver
- Flat screw driver
- Alcohol pad (you can also use cotton and rubbing alcohol, just be careful about cotton getting stuck inside the unit)
- Toothpick (or a very small screwdriver with the same girth as a toothpick)
- Flash light
- Radio code
Here is the steps:
- Locate the DVD unit in the trunk (that should be very obvious)
- Unplug all wires behind the unit. The plugs should be very easy to pull out. If you have to use a lot of force, you are pulling it wrong. There should be a little thing on top of the plug where you push it with your finger to pull out the plug. You may have to crawl behind the unit to see the plugs.
- Unscrew the four screws from the harness that holds the unit. Make sure you hold on to the unit when you take out the last screw. Otherwise, it will just slide right out and may damage the unit.
- Now that you have the unit on your hand, take out the screws that holds the top cover. After you take out the screws (there are like 10+ of them), use a flat screwdriver to loosen the cover. You will need to wiggle the cover a bit to pull it apart from the front cover plastic.
- The DVD drive should be exposed now. The lens is very close to the center. Use a flash light to shine into the unit to find the lens. You will see a purplish reflection off the lens.
- Once you locate the lens, it’s time for a clean-up. Stick the alcohol pad into a hole that’s closest to the lens, use the toothpick to rub the alcohol pad against the lens. Make sure the toothpick doesn’t touch the lens. Otherwise, you may damage the lens.
- Lens should be cleaned now. Put the unit back together and back to the car. When you turn on the unit, it will prompt for a radio code. Make sure you have the radio code already because if you don’t, the unit will not be functional.
The whole process shouldn’t more than a couple hours. I hope this information helps and save you some money.
Posted in Electronics | 12 Comments »
May 17th, 2010

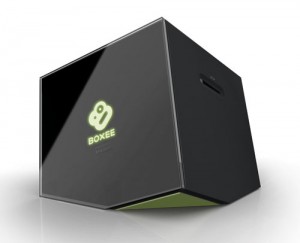
Been waiting for Boxee Box (by Dlink) forever. CNET has an article about it early this year. They said Boxee Box should be available by second quarter of 2010. Perhaps they mean by end of June? No one knows about its availability yet and it’s always been vague. I hope I don’t have to wait for another year for it.

In case you don’t know what Boxee is about, I will fill you in with a little information. Boxee is a media center that’s similar to WD TV, CinemaTube..etc. Currently, it’s software only and you can download it onto your computer. It’s based on the popular XMBC (that was build for the original XBox). So, it has a very solid base that’s it’s built upon. You can download it free and it runs on various platform including Apple TV. It has many features which will make you drool. Give it a try.
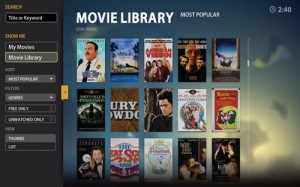
How does Boxee Box compare to other alternative such as Tvixbox, WD TV, CinemaTube? It’s all about the user interface. Again, Boxee is based on XMBC (which was a fine piece of software already), its interface is clean, responsive and intuitive. The expansibility aspect of Boxee really stands out. To name a few, you can run Netflix, web browse, online radio, news site, Twitter, Facebook with very minimal effort. It’s a great piece of software. I can only hope this project will remain active and of course stays free.
Posted in Uncategorized | 1 Comment »
May 17th, 2010
I have done some research on integrating Lightbox 2 for my Gallery 2 set up. I come across the tutorial on Gallery’s website but it over-complicates thing a little. Although their instruction is the proper way to do the integration, an average person is going to have a hard time to follow their instruction. You have to hack the code anyway, why not following an easier hack. Here is my little instruction:
- Download and extract lightbox in your web root folder assuming all necessary files are extracted under the /lightbox directory.
- Modify theme.tpl (/themes/<your theme>/templates/local/theme.tpl) by including lightbox right before </head>. It should look something like this:
<link rel="stylesheet" type="text/css" href="/lightbox/css/lightbox.css"/>
<link rel="stylesheet" type="text/css" href="/lightbox/css/lightbox.css"/>
        <script type="text/javascript" src="/lightbox/js/prototype.js"></script>
        <script type="text/javascript" src="/lightbox/js/lightbox.js"></script>
        <script type="text/javascript" src="/lightbox/js/scriptaculous.js?load=effects,builder"></script>
        {* end stylesheet and javascript for Lightbox JS *}
  </head>
- Modify album.tpl (/themes/<your theme>/templates/local/album.tpl) by adding “rel=lightbox[photos]” to each photo. It should look something like this:
<a href="{g->url arg1="view=core.DownloadItem" arg2="itemId=`$child.id`"}"
title="{$child.title|markup}"
pageLink="{g->url arg1="view=core.ShowItem" arg2="itemId=`$child.id`"}"
rel="lightbox[photos]" >
- Note that there may be multiple places where you need to modify depending on your theme. You may want to search for keywords such as “child.id” that’s within the anchor tag (“<a href=…”).
- Also note that if the /thems/<your theme>/templates/local directory does not exist, you will have to create it and copy both theme.tpl and album.tpl over.
Voila! Your Lightbox integration is done.
Posted in Uncategorized | 67 Comments »


